
This page walks through the workflow for GeneCountCraft: one-time WSL setup (Windows only), building the Salmon index, selecting FASTQ input, choosing output, and running quantification.
GeneCountCraft runs Salmon through WSL (Windows Subsystem for Linux).
1. Install WSL (Windows Subsystem for Linux) and Ubuntu by opening Windows Command Prompt (CMD) or PowerShell and running: wsl --install -d Ubuntu.
2. Reboot computer.
3. Open Ubuntu from the Start menu once.
4. Complete the first-time Ubuntu setup (create a username and password).
5. Close Ubuntu. This is only needed once.
 If Ubuntu does not install correctly the first time after reboot, run the same command again, complete the setup by creating your username and password.
Double-click the GeneCountCraft icon to start the application.
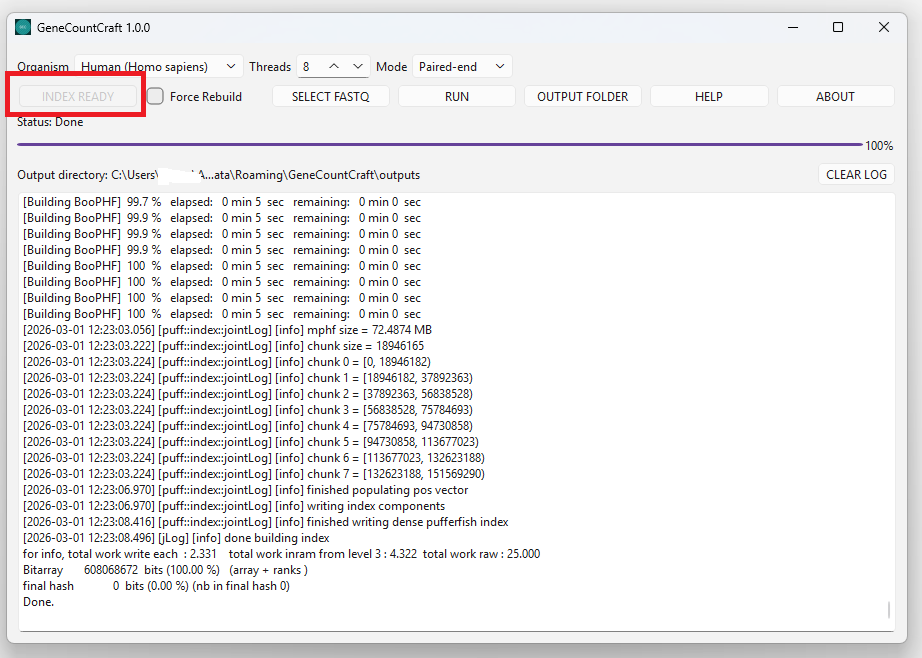
Building the Salmon index is required before running quantification. You typically do this once per organism/reference.
You have the option to rebuild; check Force Rebuild if needed. Rebuilding the index will overwrite the existing one.
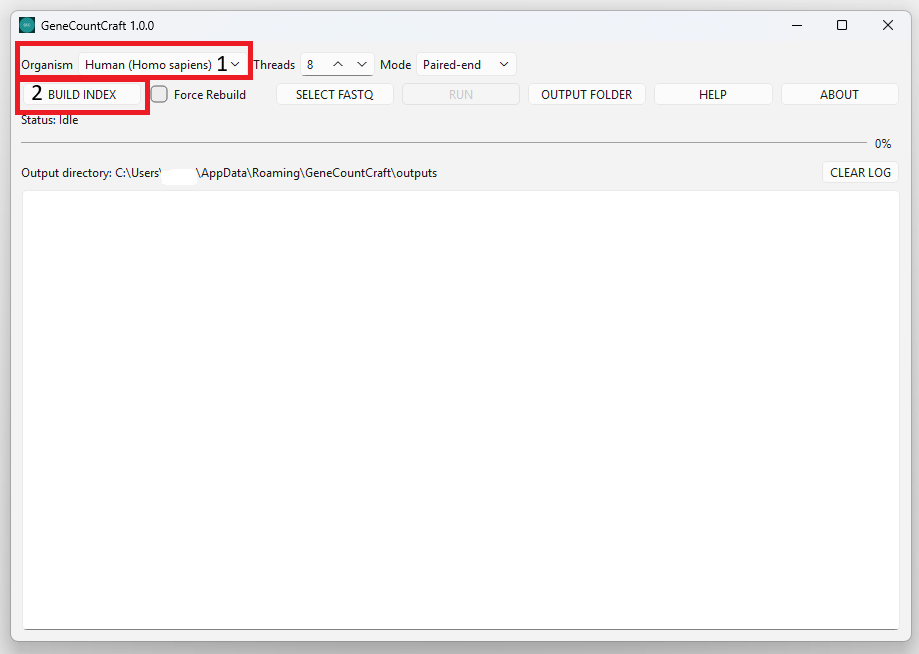
1. Choose an Organism (e.g., Human (Homo sapiens)).
2. Click BUILD INDEX.
3. Wait until the status indicates the index is ready (Index Ready).
Select the sequencing mode that matches your data.
Threads controls how many CPU threads are used. The default is 8, and you can adjust based on your PC.
- Default: 8 threads (recommended starting point).
- Increase threads for faster runs if your PC has more CPU cores.
- Decrease threads if your PC becomes slow or unresponsive.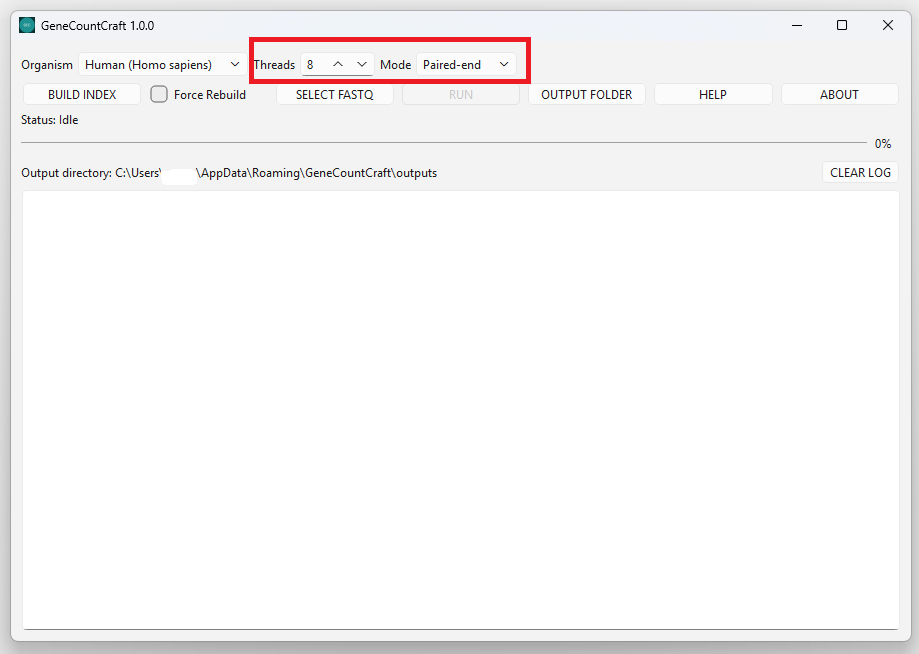
Choose the folder that contains your FASTQ/FASTQ.GZ files. GeneCountCraft scans the folder and lists the detected files in the output window (Shown in Windows only).
GeneCountCraft uses a default output directory. You can keep the default or choose your own output folder. The selected output directory will be shown in the interface.
1. Click SELECT FASTQ.
2. Choose the folder that contains your FASTQ files (e.g., *.fastq.gz).
3. Confirm the detected files appear in the output window (Windows only).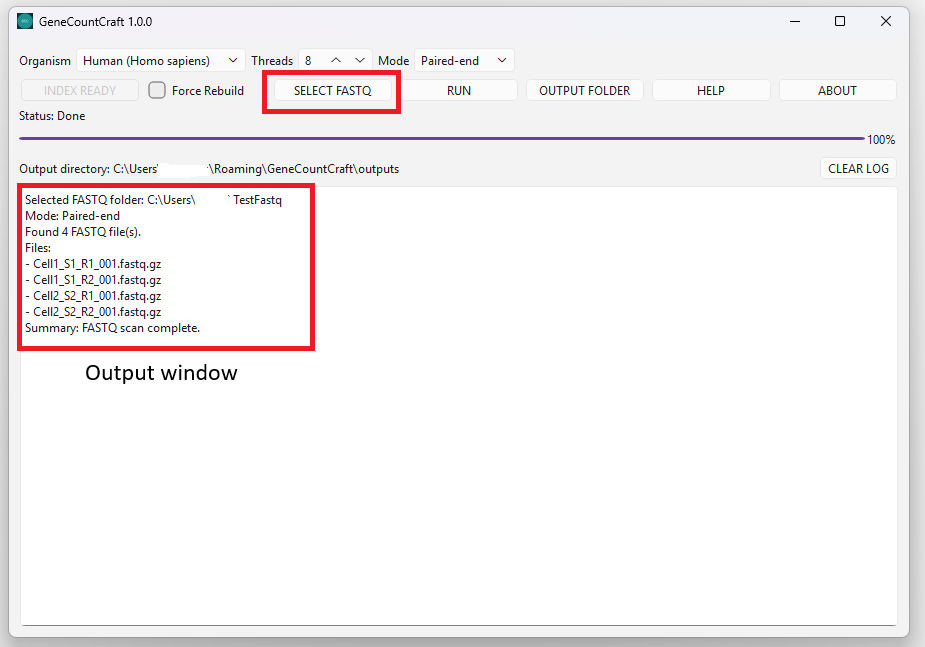
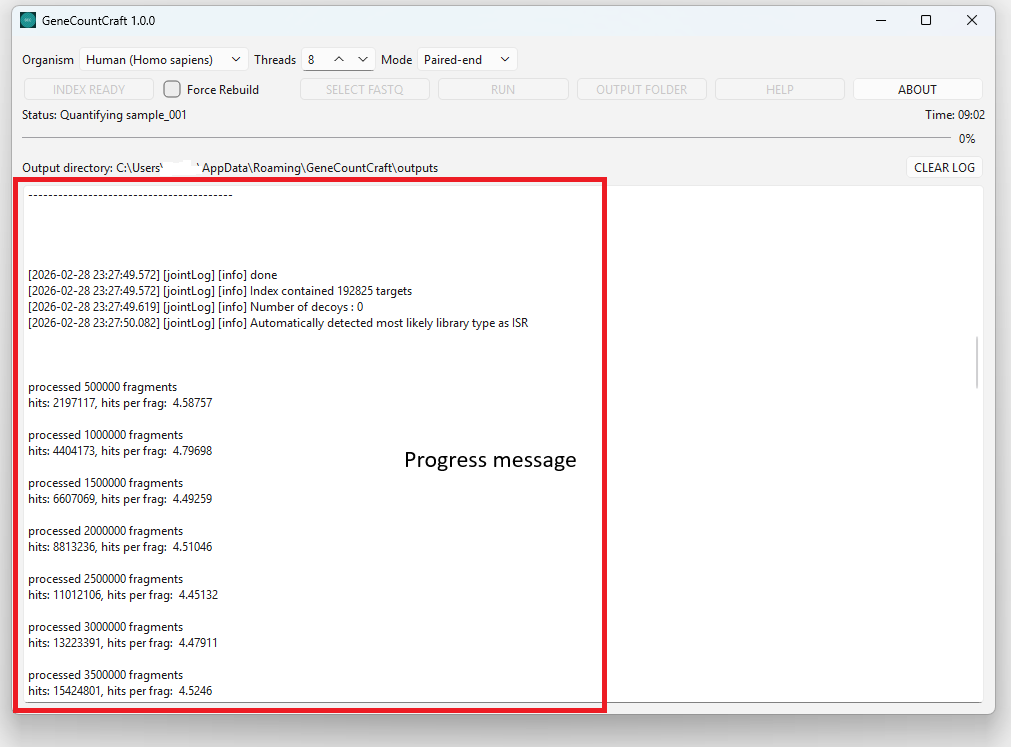
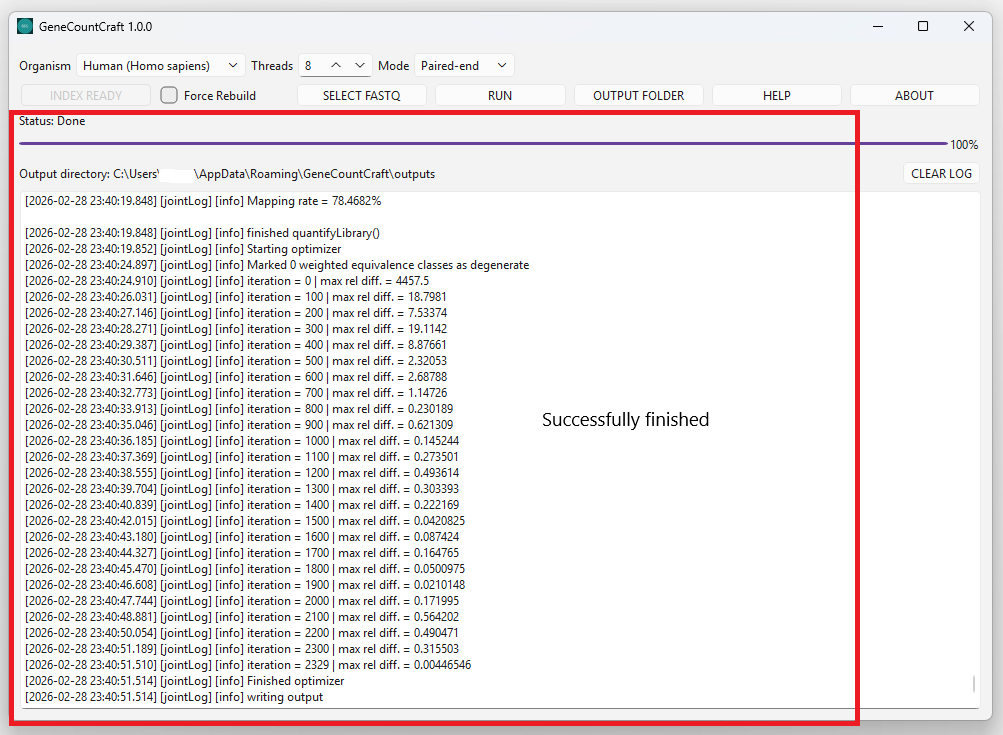
Start quantification and monitor progress in the output window. Results will be written to your output folder.
1. Click RUN.
2. Watch the output window for progress messages.
3. When finished, check the output folder for results.
expression_matrix.txt contains all samples combined.
quant.sf is generated separately for each sample within its respective folder.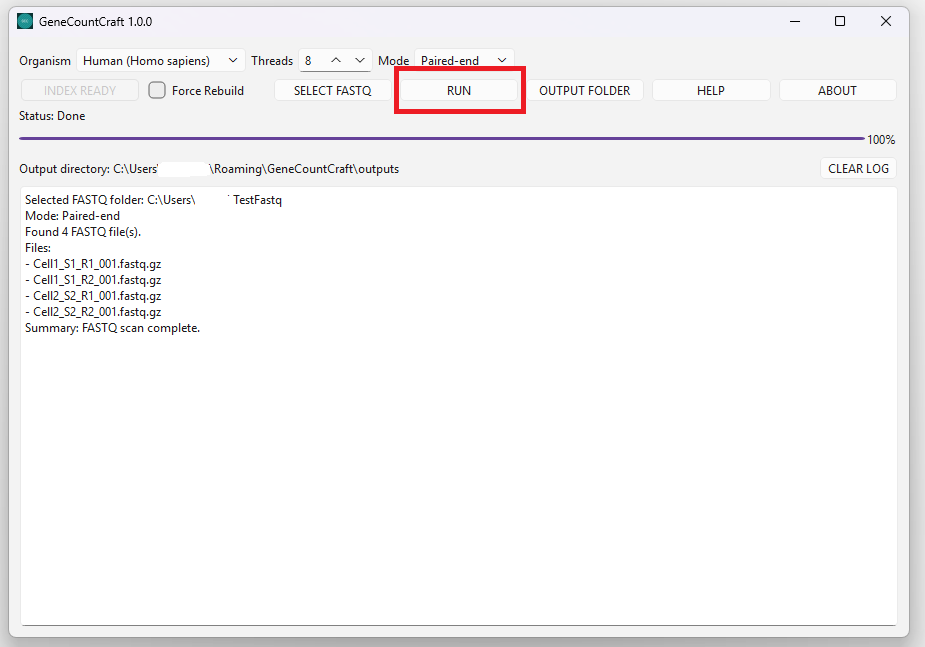
Use the tips below to avoid common issues and get reliable results.
- Start small: test with a small dataset first to confirm the full workflow works.
- Then scale up: once the small test finishes successfully, run larger datasets.
- Disk space: indexes and outputs can be large; use a drive with sufficient free space.
- Keep FASTQs local if possible: local folders typically run faster than cloud-synced folders.
- If results look unexpected, confirm the selected Mode matches your sequencing data.